AR Campaign Menu
This chapter will describe the details of all AR campaign menu and related features inside
AR Menu
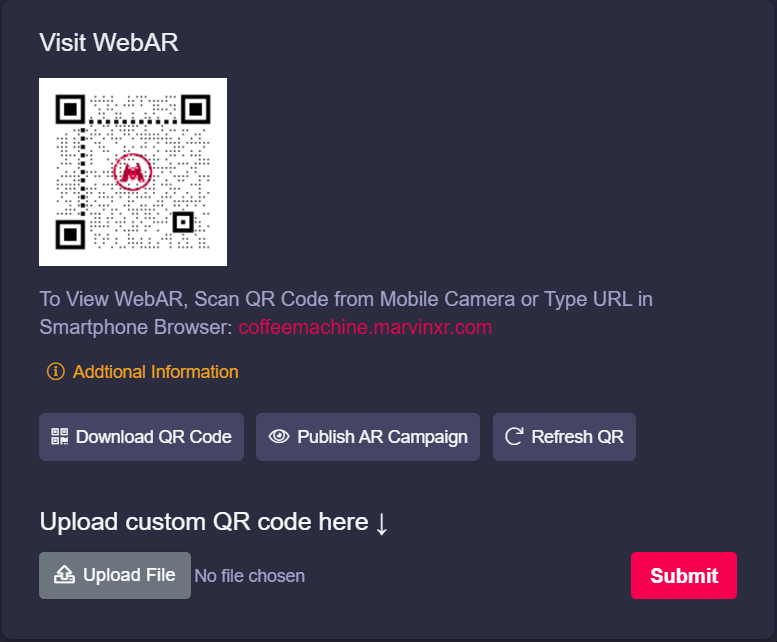
Automatic QR Code generation
With each AR campaign, Marvin XR generates a default QR code that you can use anywhere. This is a great advantage to publish and spread AR campaign quickly without investing time to create a QR for them.
You can download the QR code and use it in digital or print advertising for user engagement.
Refresh QR can help you to re-generate the QR code with varied shape (QR dots pattern will be changed).
You want to use a custom QR code with your logo etc? No problem at all.
If you don't have a custom QR code, you can create one
here (make sure to use Marvin XR campaign URL and your logo to create the custom QR -
choose your preferred color or QR design if any).
Now upload your custom QR code here so that your team members can access and download it whenever necessary.

One-click HTML view change for Surface AR
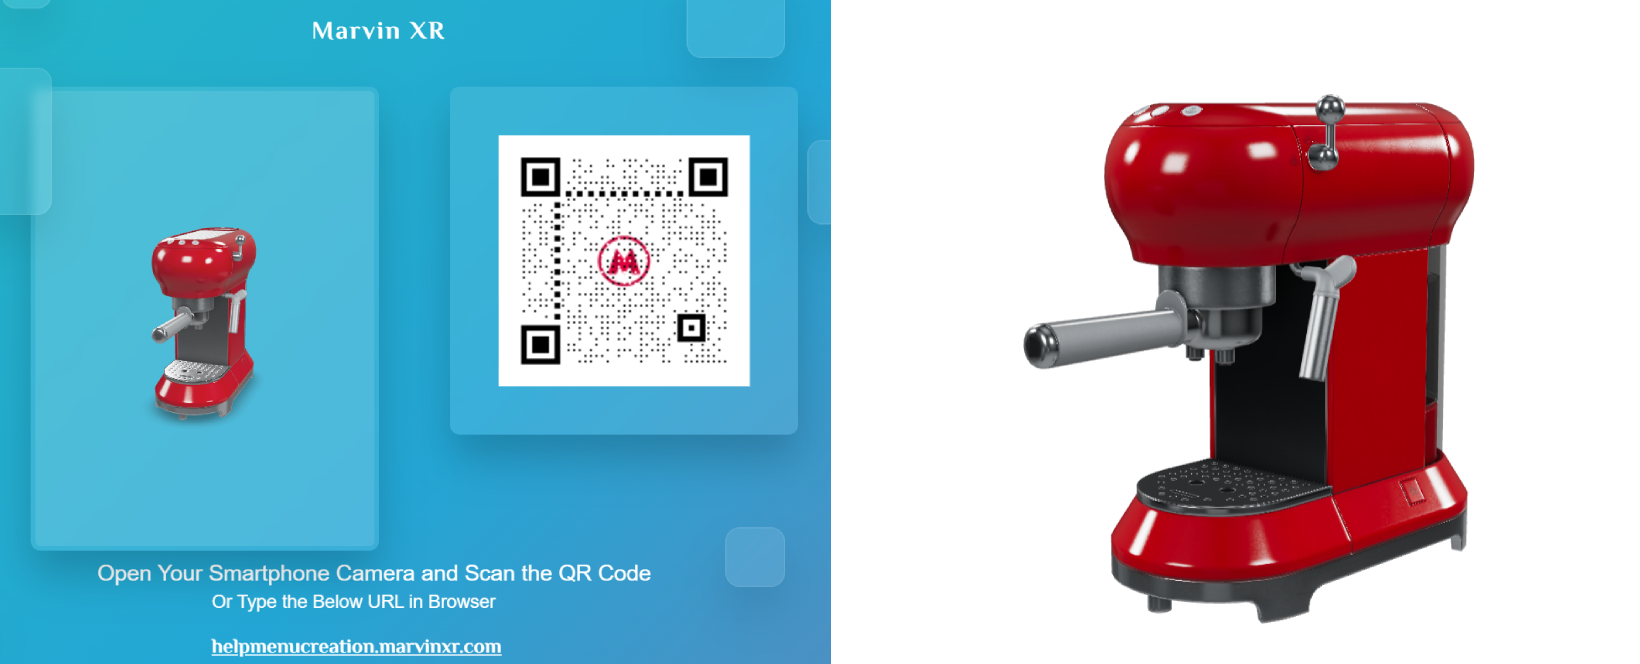
You can always view your campaign from AR Menu page. The default HTML view of the campaign has a unique design. When you open it from desktop, it'll show you the 3D model and the QR code (along with URL details) so that you can quickly test it from mobile scanning the QR from the screen.
When you open the same campaign from mobile, it'll show up in a different design to let you quickly launch AR from there (device recognition design).
But we do understand that you might need to change the design as per your campaign requirement. Especially for ecommerce, plain and simple view is important while embedding such campaigns within their online product stores.
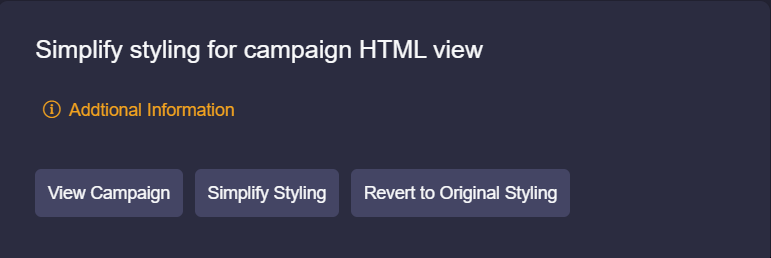
Simplify Styling
Click on
Simplify Styling would convert the campaign HTML user interface to minimalistic view immediately.
If you want to add some custom HTML components on top (like text, button etc.), do it from Web Editor easily.
If you want to revert it to its original default view, click on the Revert to Original Styling.


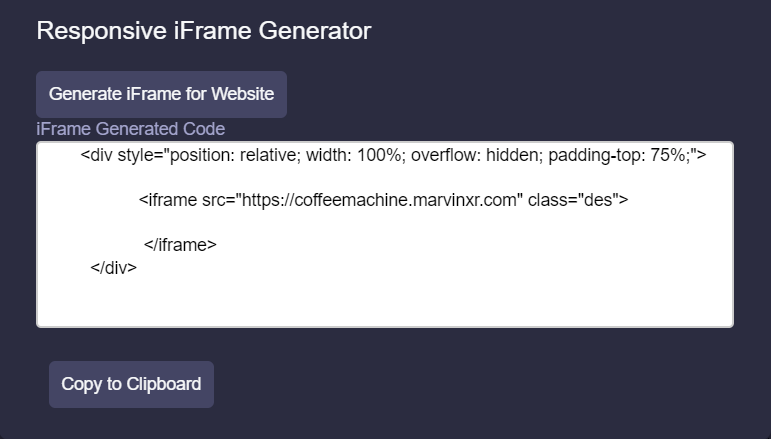
iFrame - integrate WebAR anywhere
It is crucial to embed the WebAR experience to websites, ecommerce stores or any digital platform. Marvin XR covers it with a single click.
Click on Generate iFrame for Website.
Click on Copy to Clipboard to copy the code.
Paste it in the website where you want to embed it.

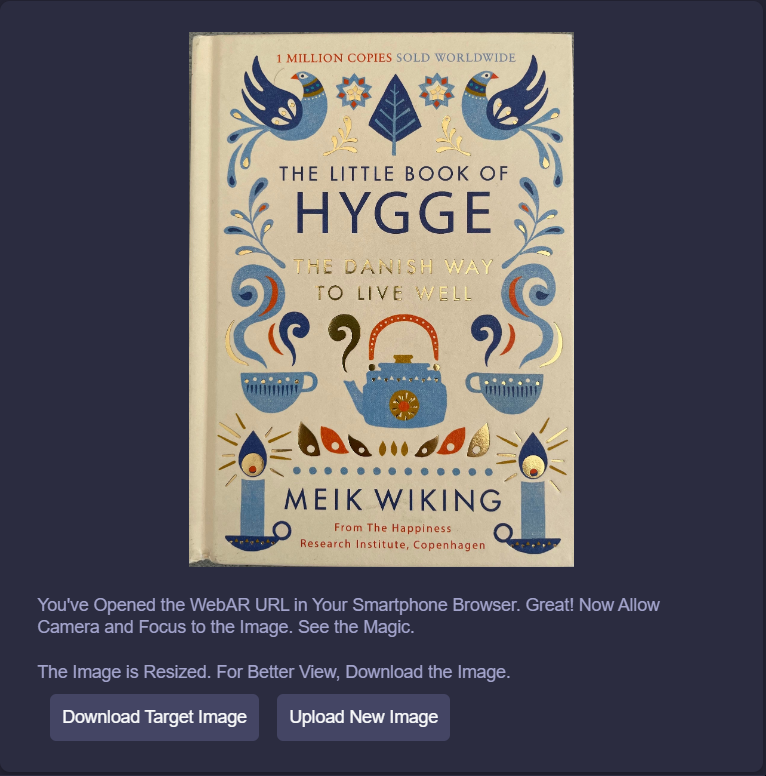
Campaign view for Image-based AR
When it's an image-based AR campaign clicking on View Details will present you different options.
Apart from QR section, the right side of the page will display the target image.
You can download the image to print it or embed it somewhere anytime.
If you want to change it, click on Upload New Image.

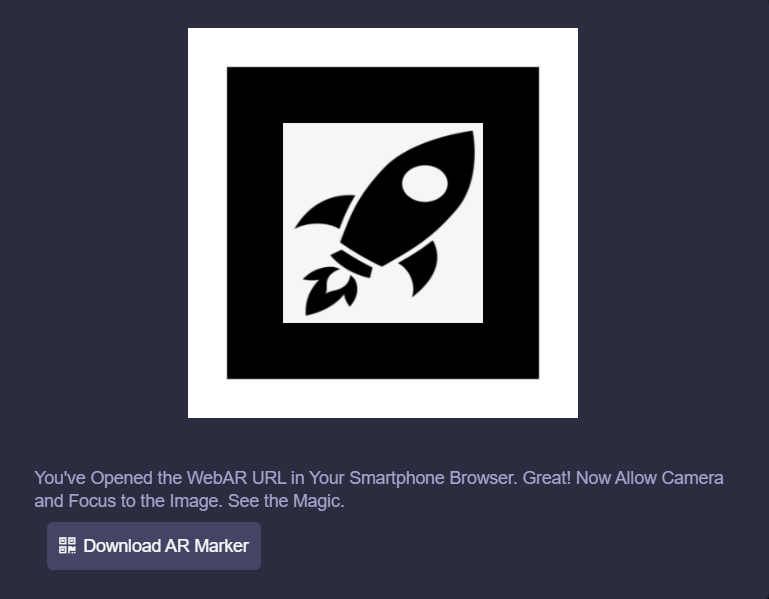
Campaign view for Marker-based AR
For marker-based AR campaig, the view will consist of the AR marker.
Focus AR camera view to the marker and AR will show up on top.
You can download the AR marker and print it i you want to use as a label somewhere.

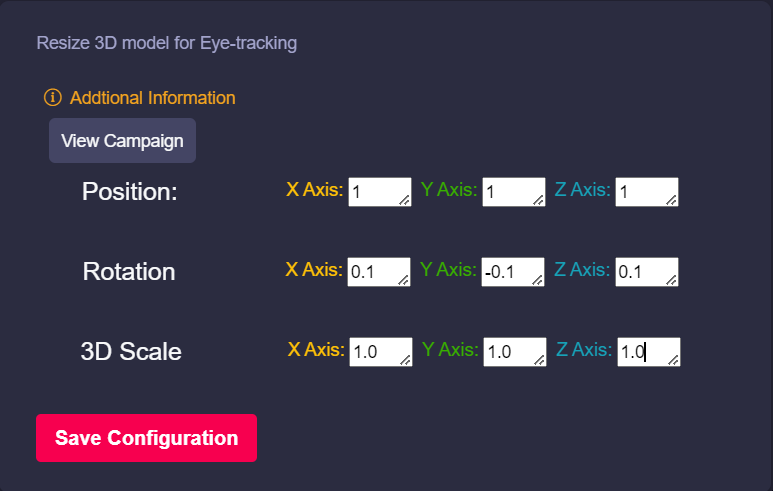
Campaign view for Eye-tracking AR
For eye tracking AR, you'll have access to 3D web configurator.
Resize the virtual eyewear size, position and scaling from the configurator from campaign editor.
Since eye-tracking AR can be viewed from a desktop, setting its virtual position is quite easy.

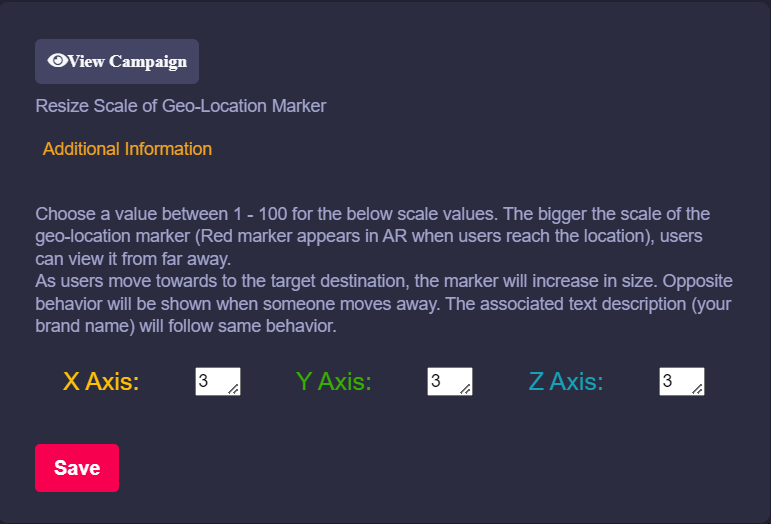
Campaign view for Location AR
For location AR, you'll have access to 3D web configurator.
Resize the marker text - how big or small it should look like when you reach the geo-coordinate.
1:1:1 - is a standard banner size to be displayed before the viewer within 10m from the target point.

Conclusion
To create and add quick touch of changes to your augmented reality campaign, AR menu can always bring some quick help for your team.
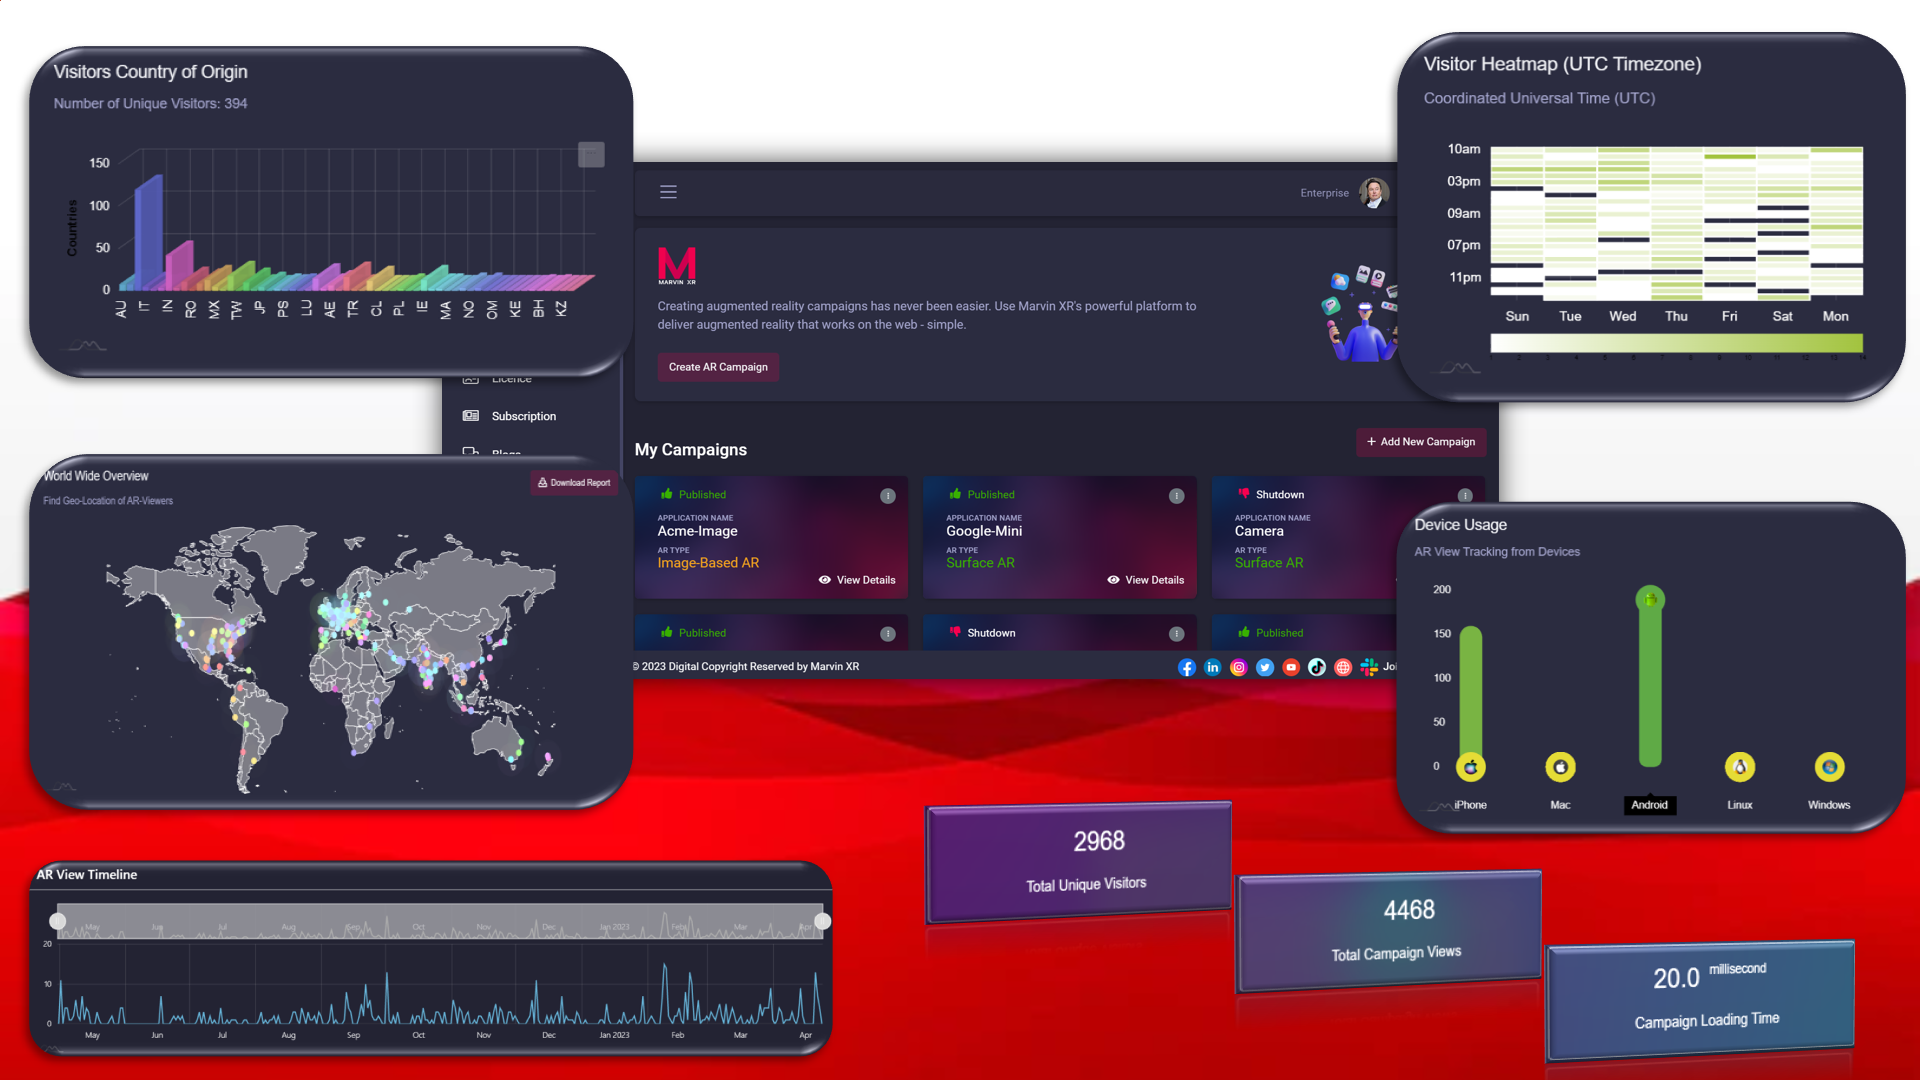
Dashboard

Web augmented reality campaign dashboard is quite useful for the business to track KPIs and have a complete overview of the campaign performance worldwide. Several key information can help business to redefine the strategy for the campaign, retarget customer segment or in case if it's an ecommerce, then even udpate product distribution based on the most engaging and lotyal customer base across geographies.
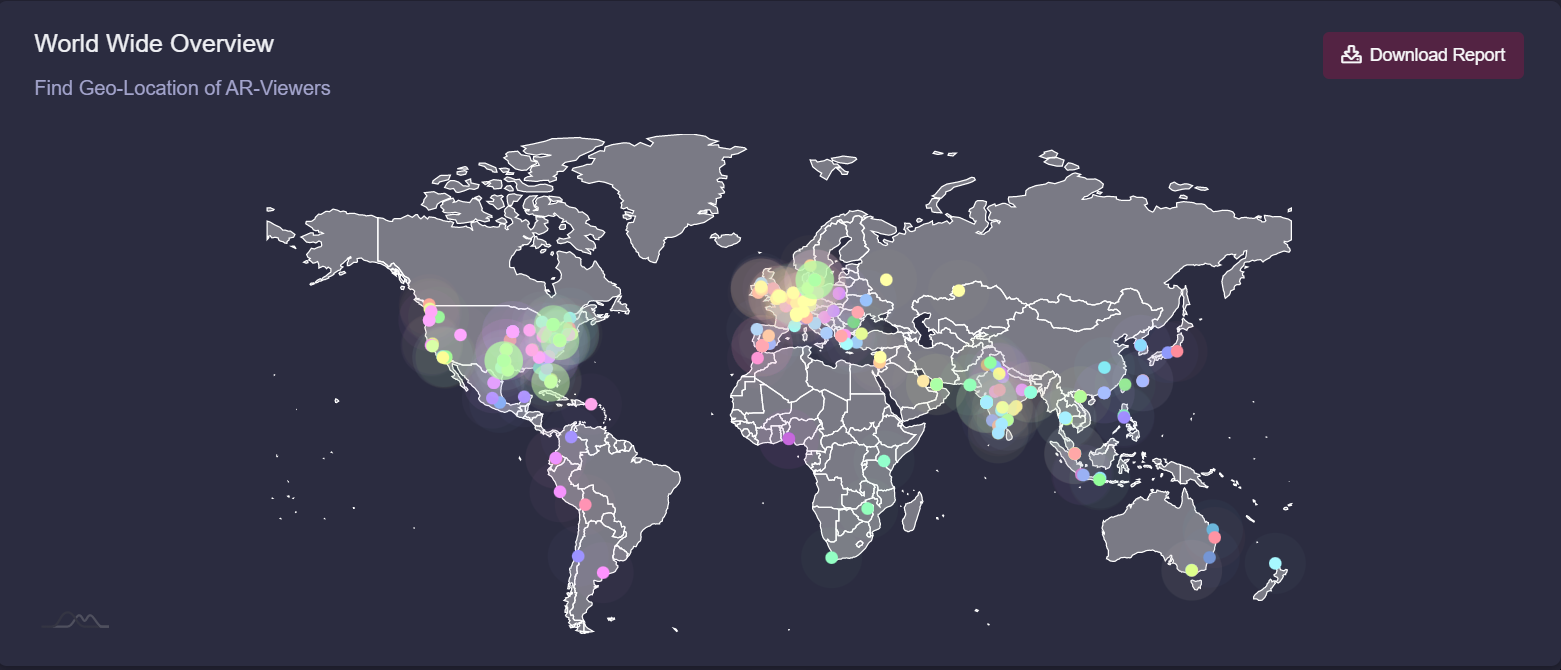
World Wide Overview
Whenever anyone activates the AR from their smartphone, the dashboard shows that IP location of the user. The dashboard holds the total viewers history for its lifetime. You can download the report to excel with all the details inside.
Consider location-based retargeting: Use location data to retarget leads who have been in a specific location or who are within a certain radius of your store. This can be particularly effective for businesses with a physical presence, such as retailers or restaurants. This is helpful for SaaS business to identify their prime locations for potential leads.

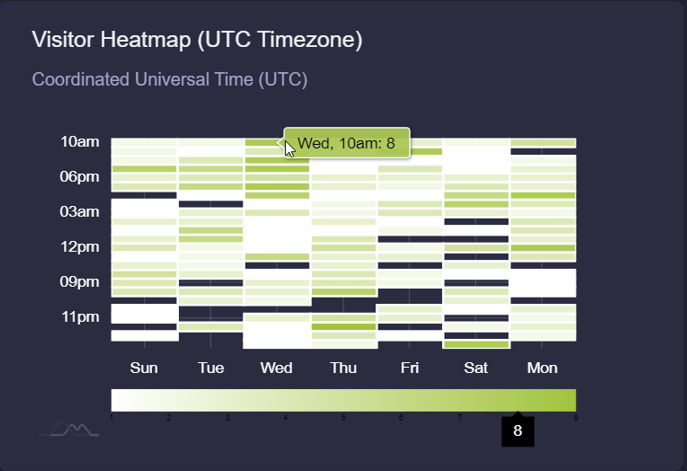
Visitor Heatmap
When does your audience like to engage more with your campaign? This is a critical insight in regards to how you can plan to launch the following campaigns (paid ads, social media strategy or email campaign) afterwards to maximize your chance to close the sales funnel quickly.

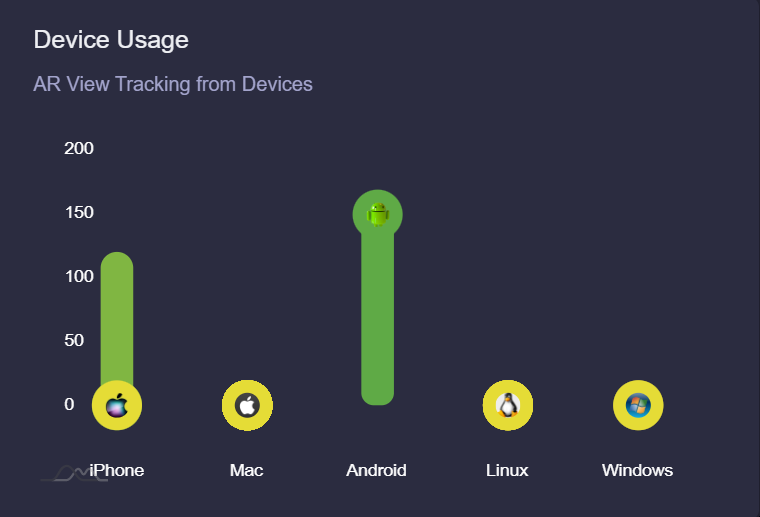
Device Usage
What kind of smart devices your audience is holding? This can provide a good understanding of the potential customer segmentation and their way of online usage.
Retargeting customer segmentation based on smartphone device usage statistics can help you build a better business by creating more targeted and effective marketing campaigns. Here are a few ways to do this:
1. Use device-specific retargeting: Use data on the devices your leads are using to retarget them with relevant ads. For example, if you know that a significant portion of your leads are using iPhones, you might create device-specific retargeting campaigns that showcase the benefits of your product on an iPhone.
2. Create mobile-specific promotions: Use data on device usage to create mobile-specific promotions. For example, you might offer a discount to customers who engage with the AR campaign or make a purchase from their mobile device.
3. Tailor messaging to mobile usage: Use data on device usage to tailor your messaging to the mobile experience. For example, if you know that a significant portion of your leads are using their smartphones on-the-go, you might create ads that emphasize the convenience and portability of your product.

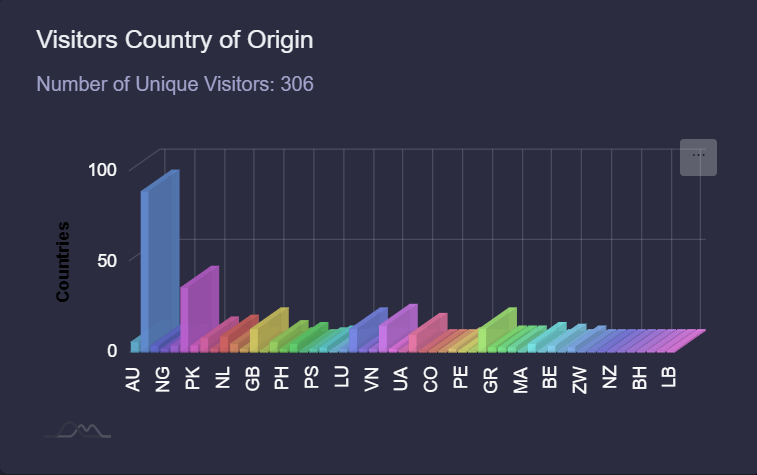
Visitors Country of Origin
When you aspire to launch a true international campaign to spread your brand recognition over internet, this view will help you to grab a fair insight of which country could be your next target to extend your business with more people interested in your product or service.

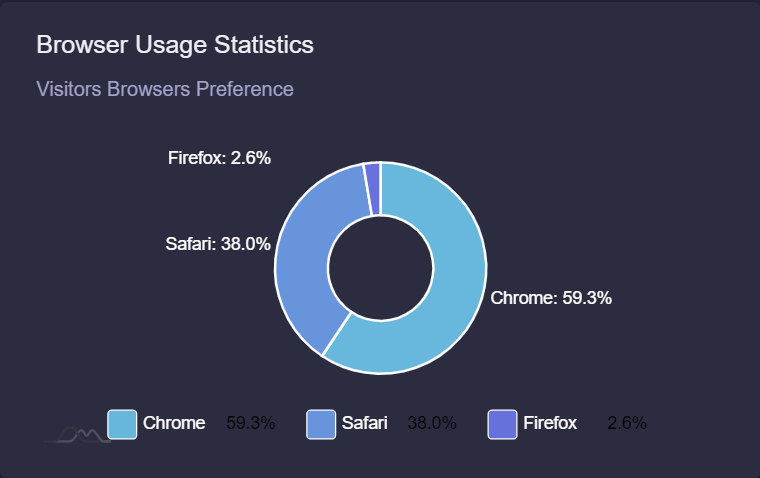
Browser Usage Statistics
If you have potential leads based on their web browser preference, there are several ways you can use this information in your marketing campaign. Here are a few strategies to consider:
1. Tailor your ad messaging: Use the information you have about your leads' web browser preference to create tailored ad messaging that speaks to their specific needs and interests. For example, if you know that a lead is using Safari on a Mac, you might craft an ad that emphasizes the compatibility of your product with Apple devices.
2. Create targeted landing pages: Use the information about web browser preferences to create targeted landing pages that cater to each group. For example, if you know that a significant number of your leads are using Chrome, you might create a landing page that showcases the benefits of your product in the Chrome environment.
3. Consider browser-specific promotions: If you have a large number of leads using a particular browser, consider creating browser-specific promotions to encourage them to take action. For example, you might offer a discount to Chrome users who sign up for your service or buy your product.
4. Use browser-based retargeting: Use browser-based retargeting to serve ads to users who have already visited your AR campaign. This can be a highly effective way to keep your brand top-of-mind and encourage leads to take action.

Remember, however, that web browser preference is just one data point among many, and should be used in combination with other data and insights to create a truly effective marketing campaign.
Insight
Web augmented reality campaign insight help you to track your AR campain to the micro level. This is important to keep a progressive overview of your campaign performance and perhaps improve the campaign from time to time or experiment to see the uplift of user engagement graph in the long term.
Daily user view history can provide valuable insights into the interests and behaviors of your leads, which can help you improve your marketing campaigns and increase the chances of deal closure. Here are a few ways to use daily user view history to improve your marketing campaign:
1. Segment your audience: Use data on daily view history to segment your audience and create targeted campaigns. By grouping your leads based on their interests or behaviors, you can create messaging that is more relevant and effective.
2. Create retargeting campaigns: Use data on daily view history to create retargeting campaigns that reach leads who have already shown an interest in your products or services. By targeting leads who have visited your website or viewed specific pages, you can create campaigns that are more likely to lead to a sale.
3. Analyze trends: Use data on daily view history to analyze trends in your leads' behavior. By understanding what pages or products are most popular, you can create campaigns that are more likely to resonate with your audience.
Total Unique Visitors
A viewer can open an AR experience many times due to its novel and wow effect. But if the user is using same smartphone, opening an AR campaign multiple times will not count the user as multiple persons. It will still be considered as a unique user. Thus the total unique visitor will show your campaign's maximum reach within its lifetime.
Total Campaign Views
As a society, we still widely rely on word of mouth to decide on any kind of purchase. WebAR campaign can manifest it to manyfold with its unique user experience associated. Often, upon discovering, users are keen to show the experience to their friends and family. As a result, one user can view a campaign multiple times. We capture the total campaign views too.
Campaign Loading Time
WebAR campaign's success depends on its agility and speed to get loaded faster in users' smartphone. Too much HTML components associated can overkill a campaign. The rule of success is to keep things simple. Your campaign loading time is a valuable metric to measure the performance benchmark under ideal conditions.

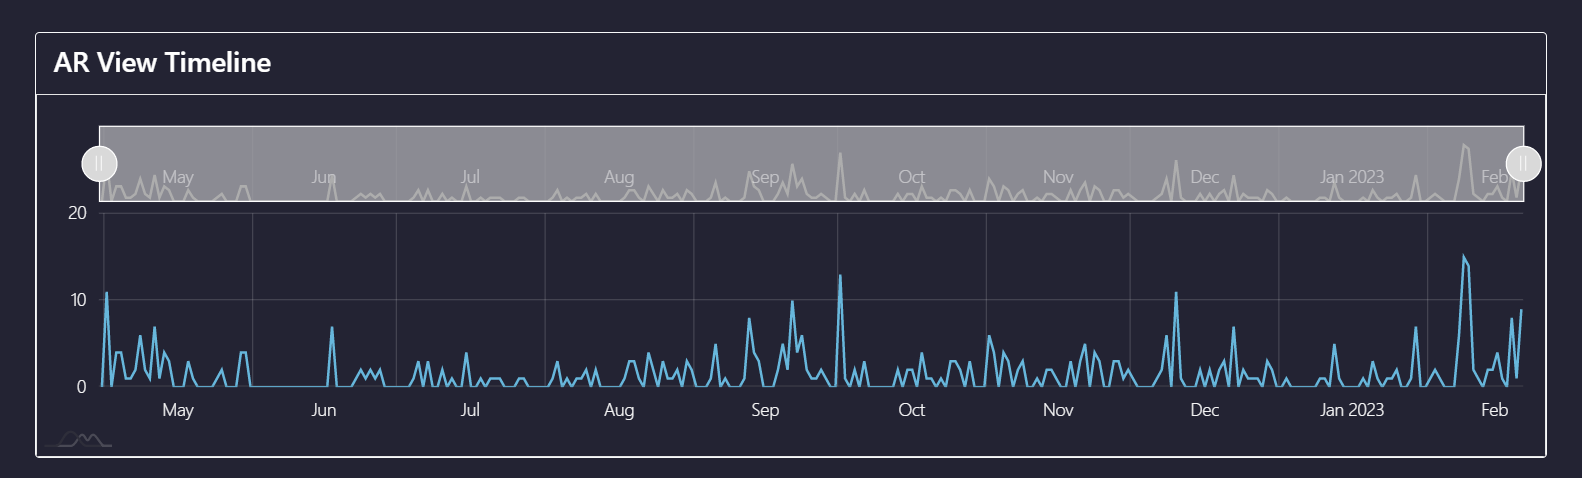
AR View Timeline
Your campain lifetime performance index is enlisted within this segment. The daily user engagement will highlight the performance from day to day. If you want to analzye a specific timeline, just drag the above bar to increase or decrease the span of your search time period. This way, if you are running an AR campaign for a longer period of time (typical with ecommerce related SKUs), getting back to past and analyzing certain phases could always be useful for business insight.

3D Model
3D Model View is to help you to get an overview of the 3D model that you are using for your AR campaign. From here, you can upload a new 3D model anytime which would get reflected to the campaign immediately.
|
There is no upper limit restriction to upload a 3D model of any size. But for webAR, the smaller the 3D model size, the better the campaign performance will become.
|
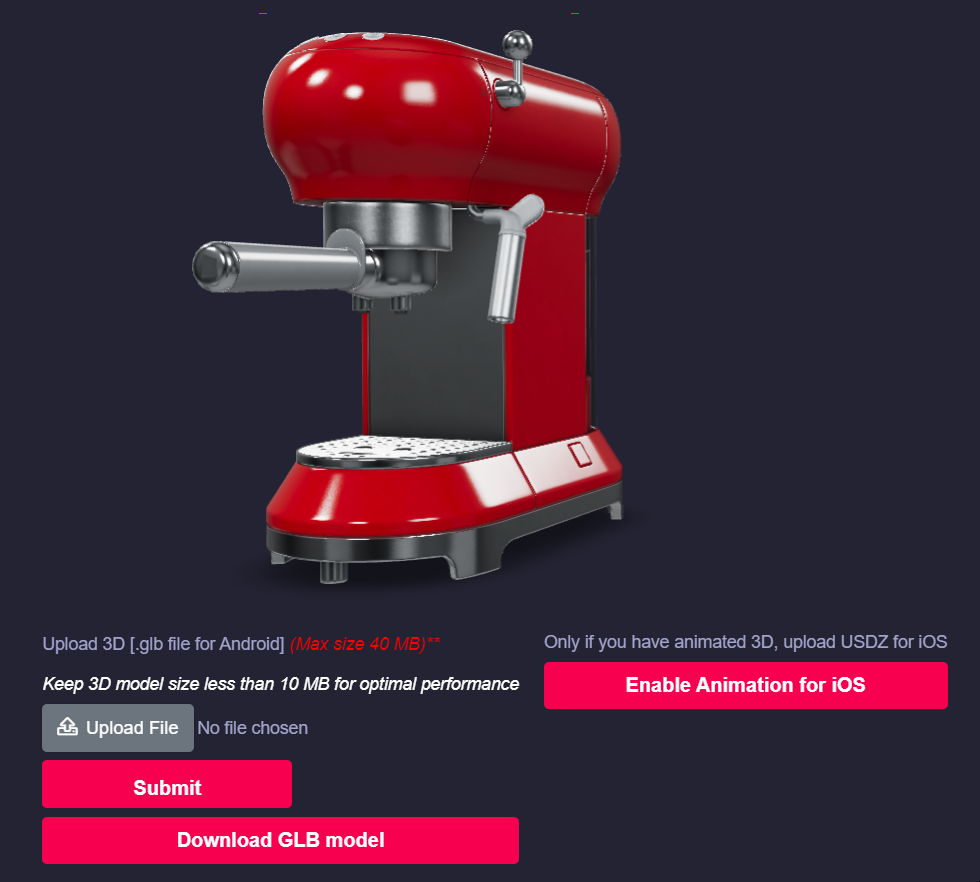
3D Model View for Surface AR
It is recommended for Surface AR to upload a GLB and a USDZ model whenever you want to change.
Click on the button Enable Animation for iOS and USDZ uploading option will show up there.
But you can only upload a GLB 3D model and skip uploading USDZ altogether.
Marvin XR can auto convert the 3D model for iOS usage.
Please follow the steps
here for achieving that.
|
Please note that for animated 3D models, the above steps will not work
|

3D Model View for Image-based AR and Marker-based AR
For image-based and marker-based AR, you need to upload GLB 3D model only.
No other 3D model format is necessary there unlike Surface AR.
It includes static or animated 3D models.

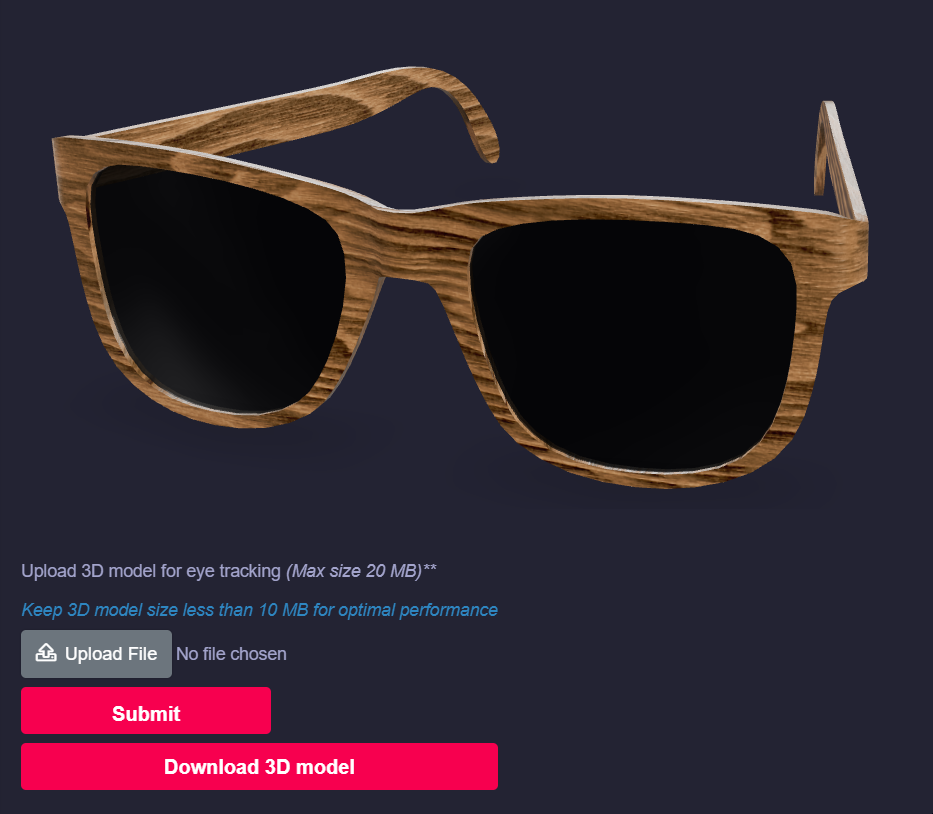
3D Modle View for Eye Tracking AR
For Eye tracking AR, you need to upload GLTF model.
GLTF works for Android, iOS and Windows (desktop mode).

GLB Export
You are ready to build the first web based AR camapign but you don't know how to get the GLB format for 3D model? No problem, we have a solution ready for you. In the world of 3D modelling, several mainstream formats are available. Some of the most common 3D file formats are:
- GLTF
- GLB
- OBJ
- FBX
- USD/USDZ
- STL
- STP
- KOLLADE and many more
Marvin XR accepts
GLB because
GLB is a file format used for 3D images and scenes. When you open such a file, you can view the model/scene from all angles and in detail. Like the beloved JPG format used for static images, GLB offers a perfect combination of small file size and relatively decent detail. It may not be as rich in detail as most FBX files, but is
incredibly compact and contains a range of 3D assets in a
single file (this is a key component for better WebAR).
This format was created in 2015 and is the younger brother of GLTF (Graphics Language Transmission Format). The difference between the two is that GLB is a binary format while GLTF is based on JSON. Additionally, GLTF files are about 33% larger and do not include some of the supporting data found in GLBs (like geometry, textures, and shaders).
Since GLB is comparatively new in the market and GLTF is widely available because of its earlier release, you may face an issue to convert a GLTF into GLB while creating an AR campaign.
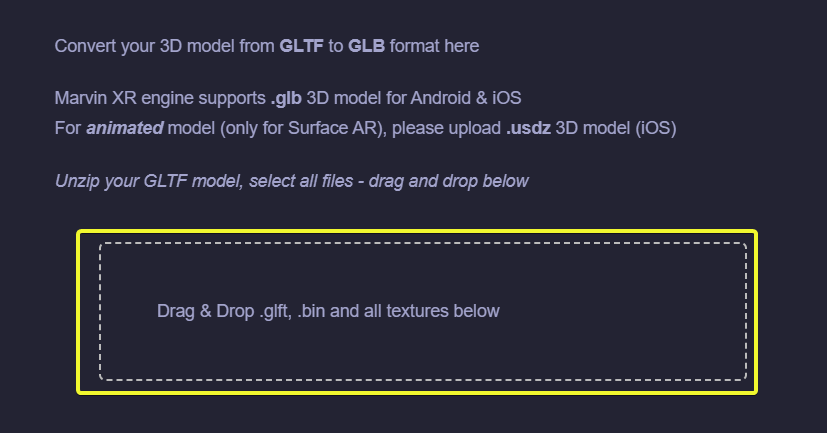
Click on View Details of an AR campaign and go to GLB Export menu.

Unzip your GLTF file within your computer, select all the files inside and then drag and drop them into the above marked area. Your GLTF will be immediately converted into GLB file and get downloaded automatically.
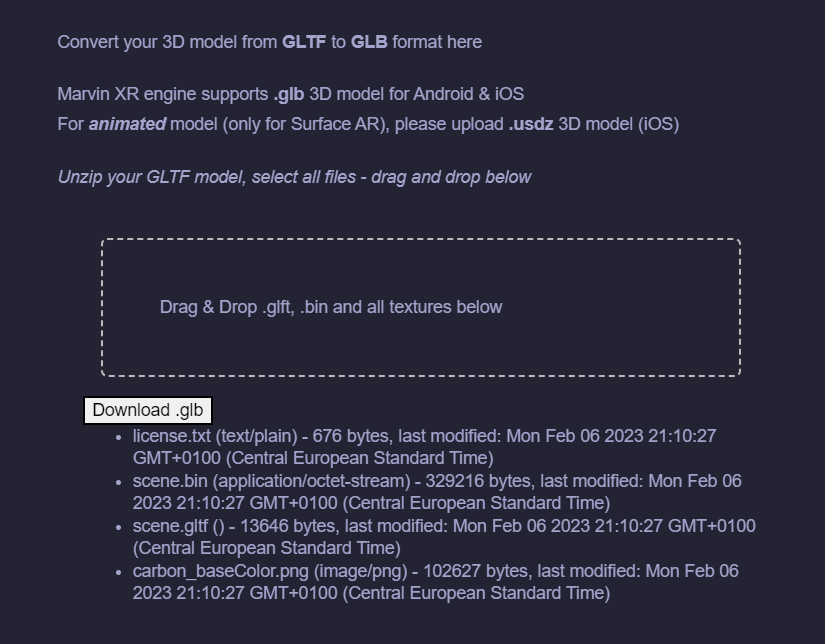
|
If .glb does not get downloaded automatically, please click on Download .glb button
|

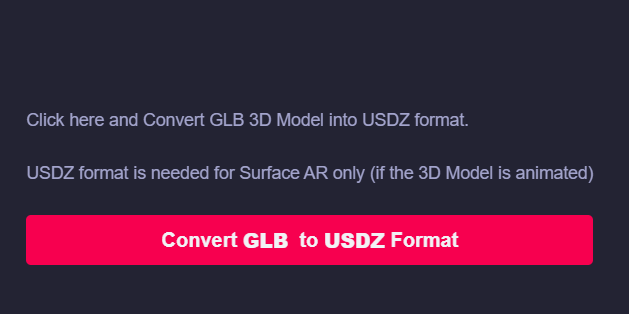
If you want to convert GLB into USDZ format - click here. This is a drag and drop USDZ builder:

2D Compiler
You have created the image-based AR campaign. But now you have decided to change the target image for the campaign and get a new image for the same. How to do that?
This is why for each image-based AR campaign, there is an extra menu called 2D Compiler.

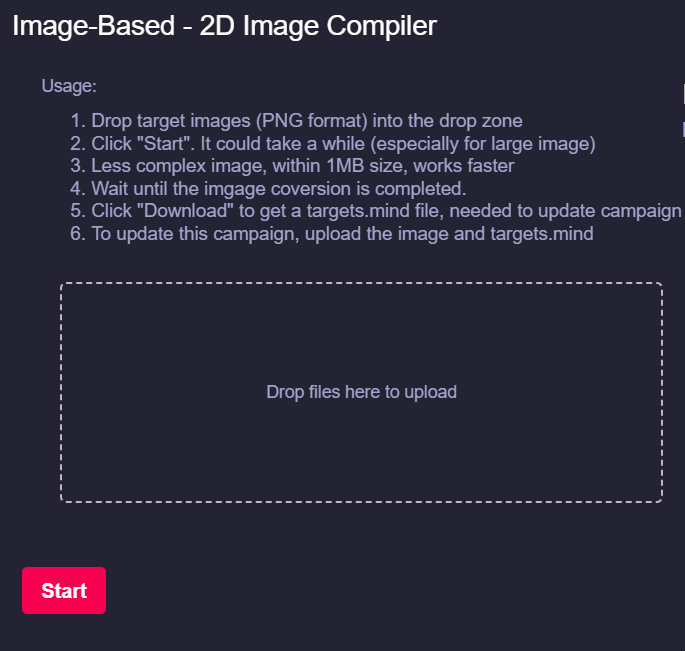
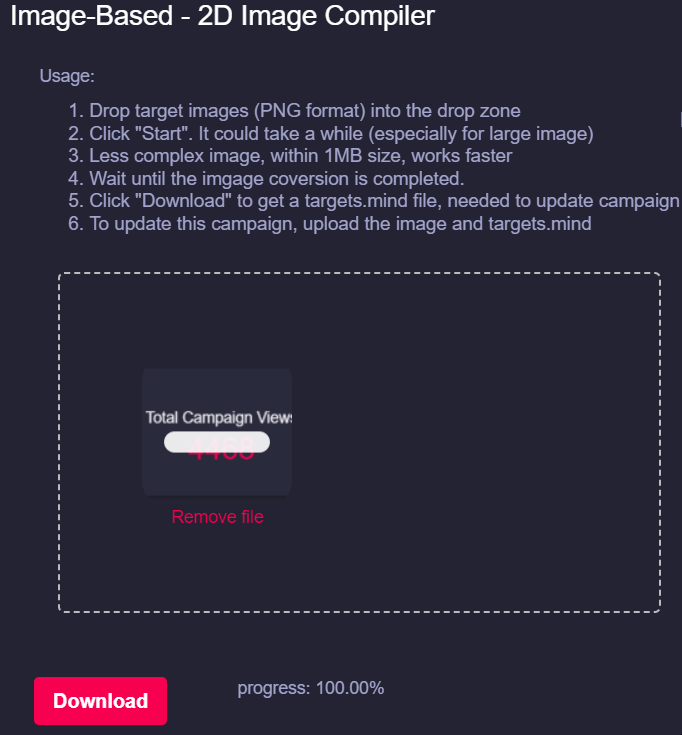
2D Complier works in a very simple way. Get your new target image and drag it to the above box - Drop files here to upload and click on Start button to create the camera identifiable format (targets.mind). Based on the size and complexity of the image, it can take from few seconds to minutes to complete the step.
Click Download button to download the AI generated camera recognition trained (targets.mind) file.
|
Always get your target image in .PNG format
|
|
Do not change the name of the camera recognition model file. Keep it as targets.mind
|

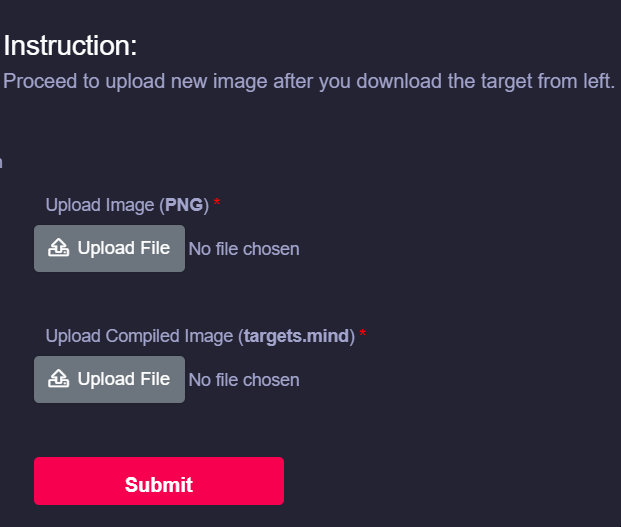
Go to the right side of the page and upload your PNG target image and the AI generated camera recognition file (targets.mind). Click Save.
Congratulations. Now you have successfully uploaded the new target image for your image-based AR.
Web Editor
You are so happy to see your first WebAR campaign running live. Amazing feeling - isn't it? But now it needs an advanced setup - customizing your AR campaign. Web Editor is there for you to help.
But if you have the very basic knowledge of how HTML works, then it'd be fairly a simple task for you.
Because simplicity is beautiful -isn't it?
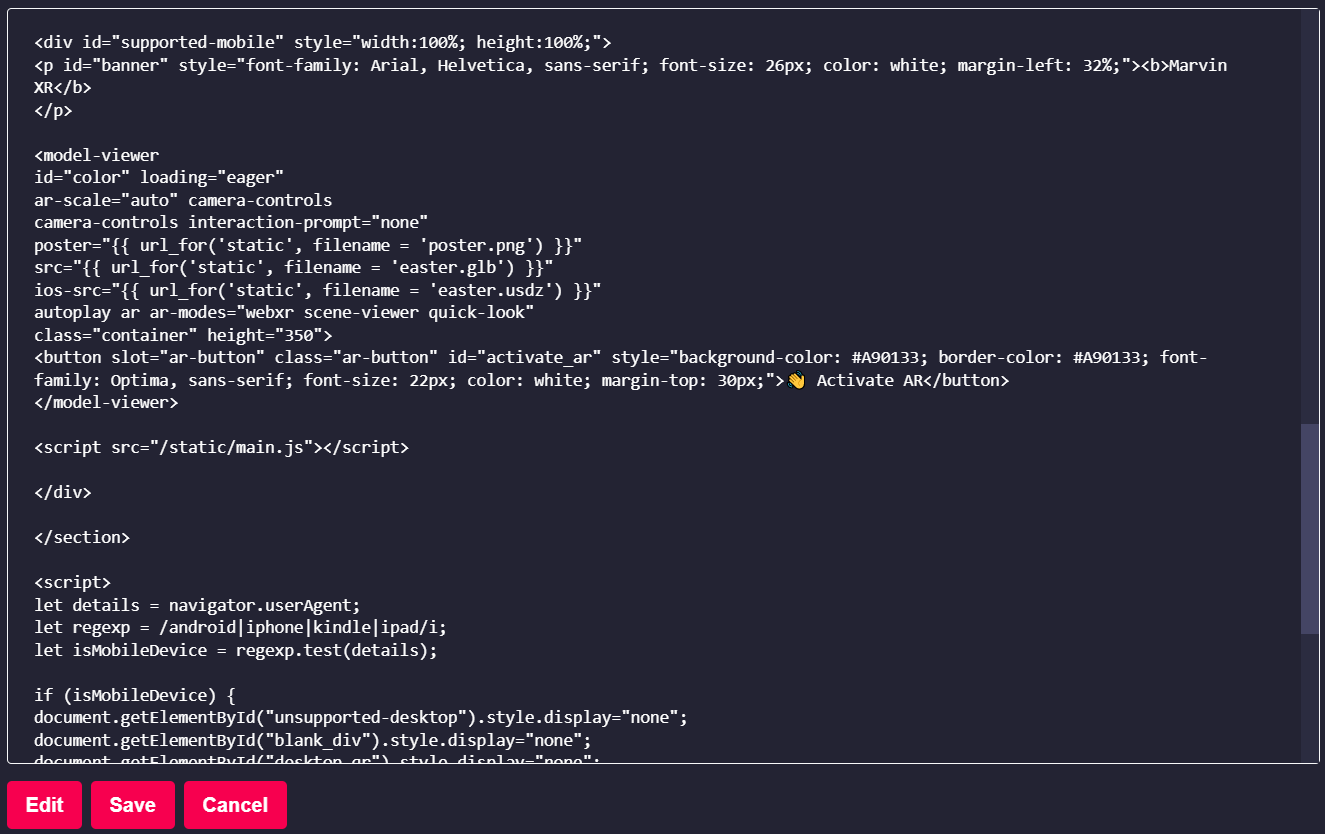
Click on View Details of the campaign and go to Web Editor menu.
Customizing a HTML UI (AR campaign view) can take many layers. To make it brand labeled, you can quickly
- Change Page Title (update <brand_name> tage)
- Change Header (add header css with your preferred brand name)
- Change Page Color (update body color css)
- Add Buttons (go below in the body section and add buttons there)
- Add Footer (add it after body tag)
- Update Custom Tags (add css, js or other type-fonts)
You can update several AR features directly from the Web Editor. There will be more help articles on that.
Click on Edit menu, perform your changes and click Save.
Refresh your AR campaign URL to view the changes immediately.
|
Change HTML view of your AR campaign using Web Editor
|

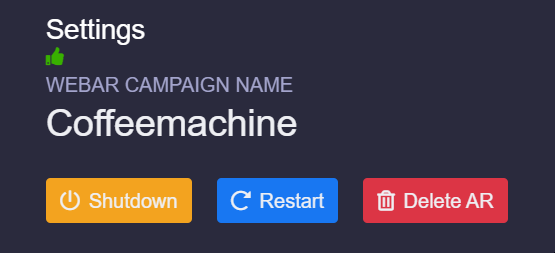
Settings
Keep your AR campaign healthy and effective with the help of Settings menu.
Let's see what are some key features packed inside:
Shutdown
Perhaps for some unforeseen reason you need to postpone your AR campaign for a brief period. Of course, you do not want to delete the campaign immediately for which you have worked maybe days or weeks. Shutdown the campaign, without deleting it forever. Thus you can save your precious work for the future.
Restart
Start your AR campaign which was previously shutdown. Sometimes, due to high volume access, if your campaign seems a little slow from performance perspective, restarting is a good option.
Delete AR
You are done with your AR campaign. There is no need to keep it there. Delete it for good.
|
Once a campaign is deleted, it cannot be recovered again. All data associated will be gone too.
|

Share AR campaign on Social Media
One of the key metrics for a WebAR camapign success is to bring it towards as many as possible audience segments. Social media channels are great to share your work to the world. Share the campaigns directly to all major social media at once.