How to create Image-based AR campaign
Follow the below steps to build your first AR campaign within minutes. Go to the central dashboard (after you login, you land up here) and click on any of the buttons - Create AR CampaignCampaigns or Add New Campaign.
1. Provide a name for your campaign. Please remember not to use any space,space, underscore or special character within the campaign name (Read here for associated reasons).

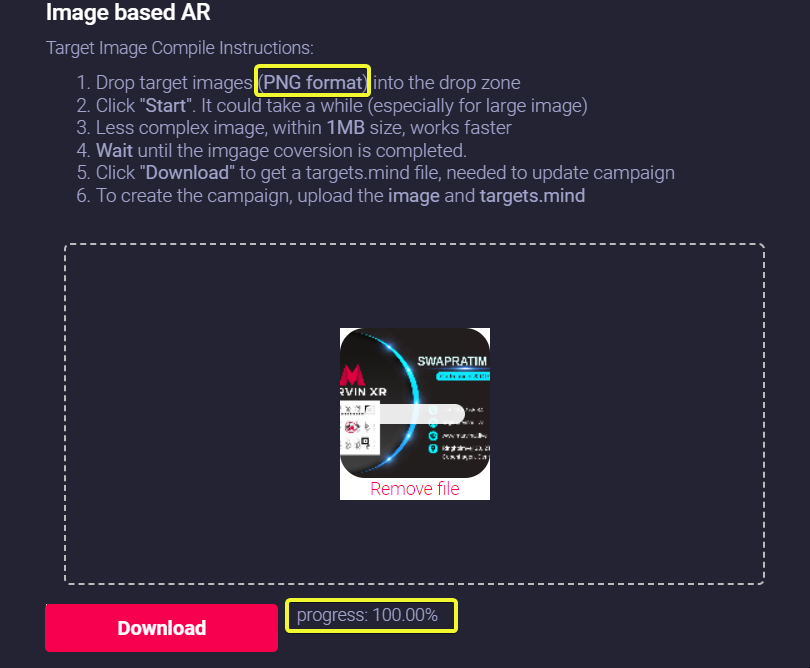
2. Drag your targettraget image (.PNG format) to the dropbox and click on Start button to create the camera identifiable format (targets.mind). Based on the size and the complexity of the image, it can take from few seconds to couple of minutes to complete thethis step.
Click Download button to download the AI generated camera recognition trained model (targets.mind) file.mind).
|
Do not change the name of the file. Keep the |
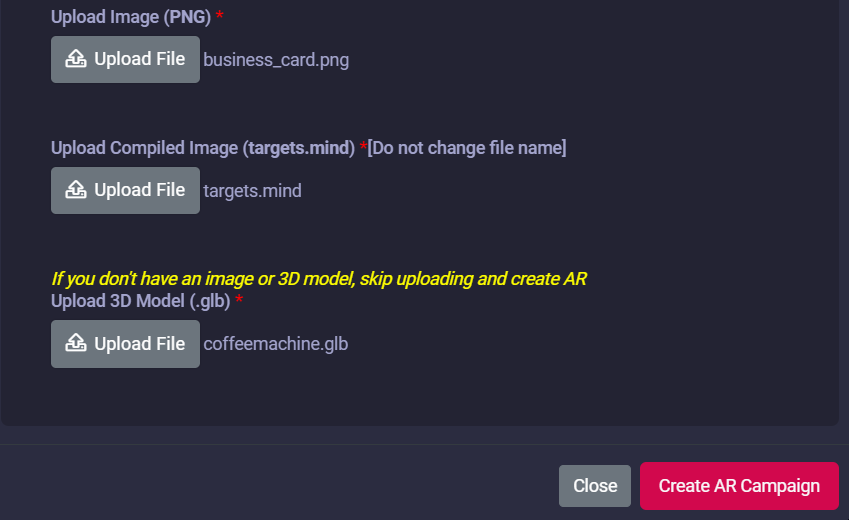
3. NowNow upload the following to the campaign:campaign:
- Target
imageImage (PNG) CameraAIidentifiabletrainedformatmodel for camera recognition (targets.mind)- 3D model (GLB)
If you don't have a 3D model, no worries - there's a default 3D model in the template (you can change it atlater anytime later)after the campaign creation).
Click on the Create AR Campaign button to finish the setup.
4. Your AR campaign can take up to 2 minute to get created. Read here for the associated reasons.
reasns
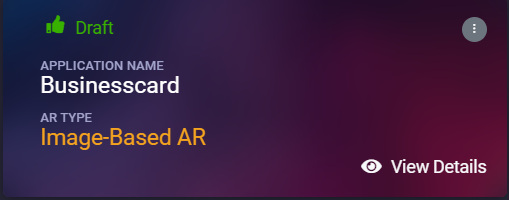
Congratulations! Now you have created your first image-based AR campaign. Enjoy the experience.