
How to create Eye Tracking AR campaign
What is Eye Tracking AR
Eye Tracking AR can work from both mobiles and desktops. Users can virtually try-on eyeglasses and sunglasses using our new eye tracking WebAR. This will help brands to create much higher user engagement from ecommerce platforms and help customers to make better decisions to purchase eyewear.
With the new eye tracking AR, now we have introduced easier way to import 3D assets for creators. You can now import GLTF folder (in zipped format) directly into the AR campaigns. Moreover, our new 3D configurator will help you to define position, rotation or scaling of 3D assets with single button click. You don't need to touch code from Web Editor anymore. This is a great step towards a true no-code WebAR platform.
Eye Tracking AR experience will definitely transform your e-commerce solution to grow business.
Follow the below steps to build your first AR campaign within minutes. Go to the central dashboard (after you login, you land up here) and click on any of the buttons - Create AR Campaign or Add New Campaign.
Step by Step Guide to Create Eye Tracking AR
1. Provide a name for your campaign. Please remember not to use any space, underscore or special characters within the campaign name (Read here for associated reasons).
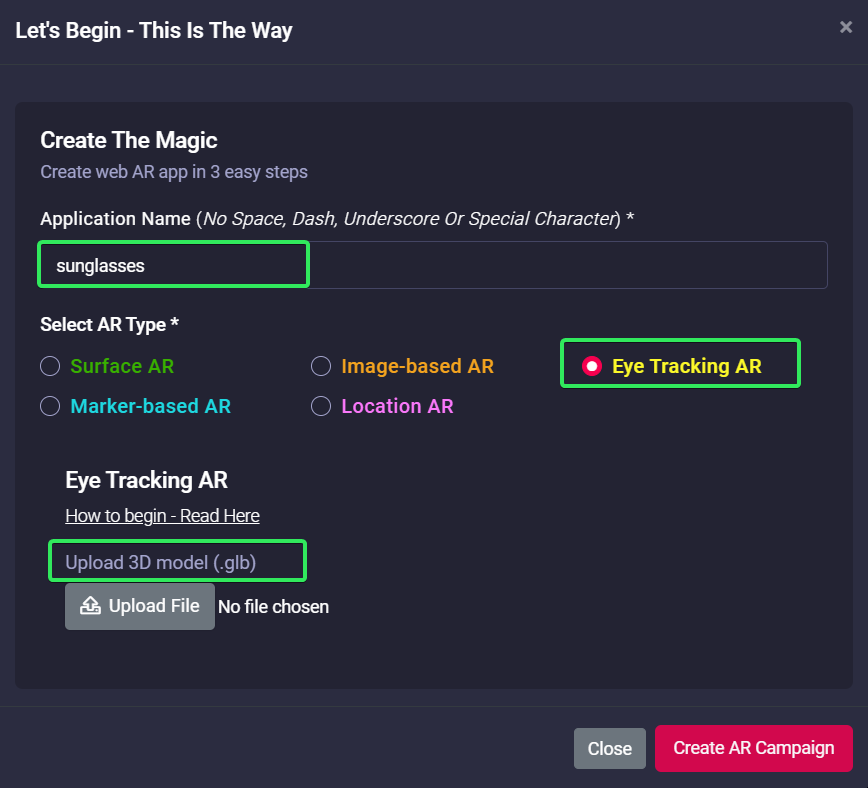
2. Upload 3D model (GLB) here. With eye-tracking AR, Marvin has introduced the GLB extension of 3D models for the campaign. Since GLB is quite popular and widely used across the industry, this will help the creators to work faster.
|
Upload 3D GLB model and click on Create AR Campaign button. |
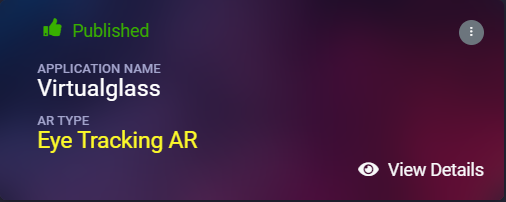
3. 3D Configurator is here to help your AR journey. Click on View Details and go to AR Show menu.
Resize the virtual eyewear size, position and scaling from the configurator and test online even from campaign editor. Since eye-tracking AR can be viewed from a desktop, setting its virtual position is quite easy.

Congratulations! Now you have created your first eye-tracking AR campaign. Enjoy the experience.
4. If you have experience with HTML, to adjust the 3D eyewear scale, position and sizing, click on View Details of the AR campaign, go to Web Editor menu, Edit and change the below sections. Once saved, you can quickly test it online.
P.S. - All values for rotation, position and scale parameters are based on X, Y & Z axis (in the corresponding order).
Rotation: If the eyewear needs to rotate its position compared to eyes locations.
Position: Does the eyewear sit way above eyes or it needs a little lowering - positioning can fix it.
Scale: How big the eyewear should appear compared to the face size - fix it with scaling factor.
