3D Editor User's Guide
Introduction
We have released a much waited feature - Web Editor for 3D Models in Marvin XR. This will help the creators to build WebAR campaigns faster. If you are going to use 3D Editor for the first time, the following guide will help you to make it a useful tool.
How to use 3D Editor
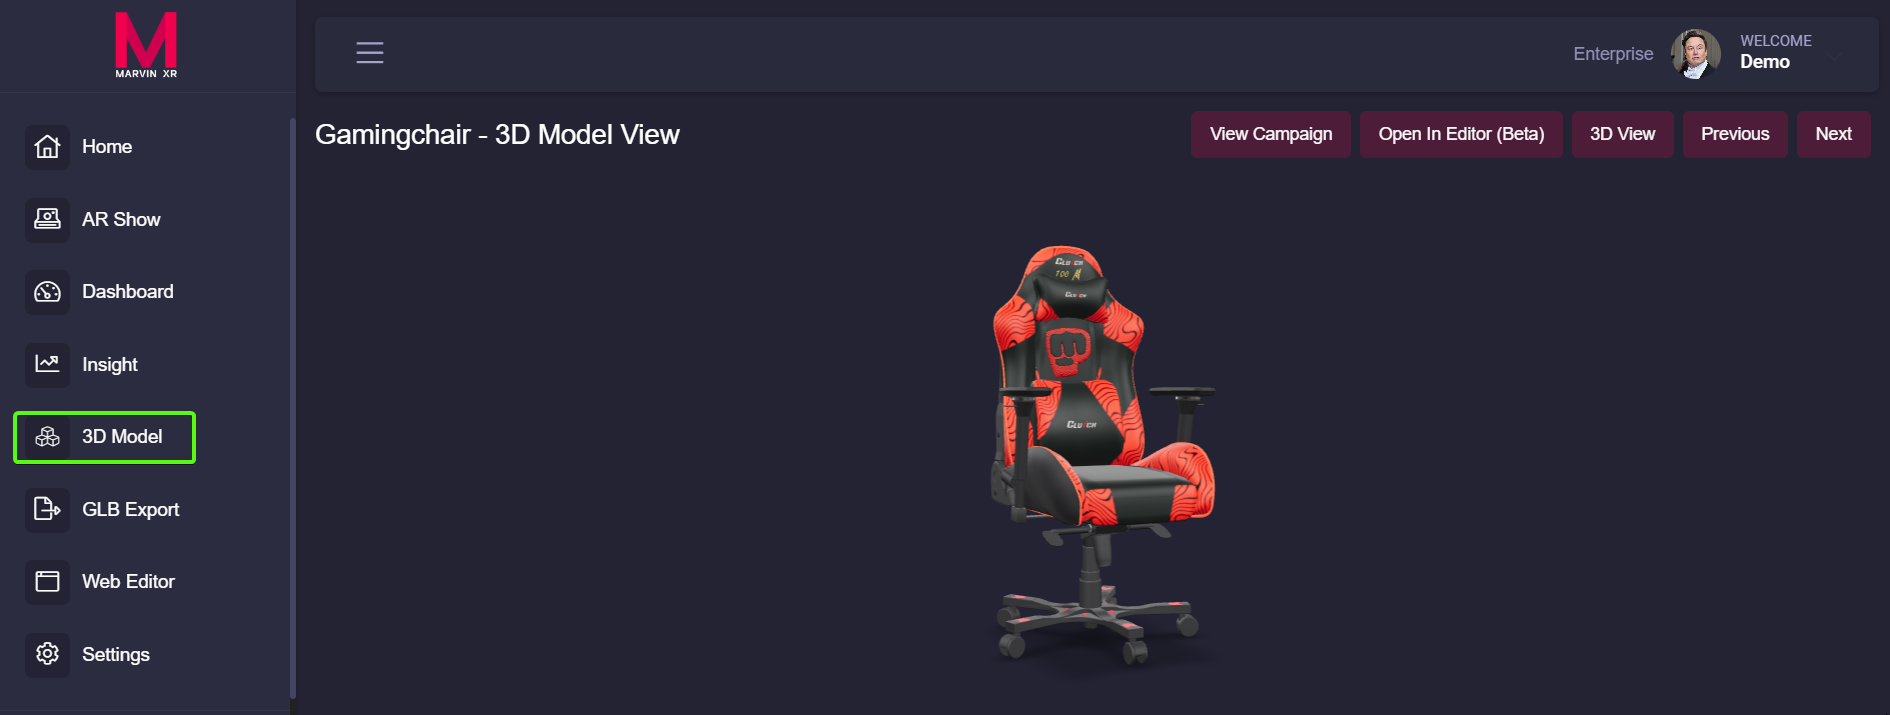
Open any AR campaign and go to 3D Model menu. This is where you can manage your 3D asset for your AR campaign.
Click on the Open in Editor button - this will open the 3D model in 3D Web Editor.

Scroll your mouse to zoom, right click to drag the view and adjust accordingly.
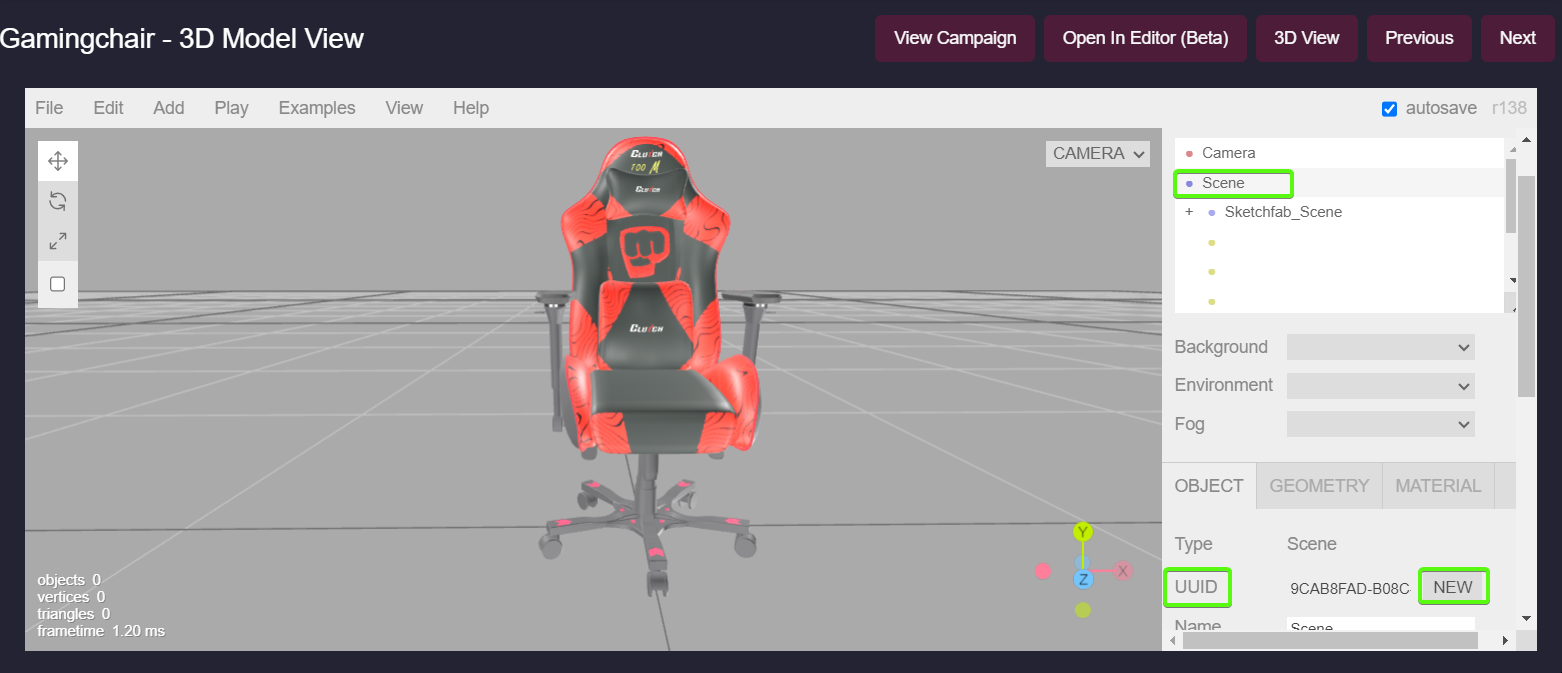
At this point, the 3D model is still non-editable. You need to follow a simple step to make it editable.
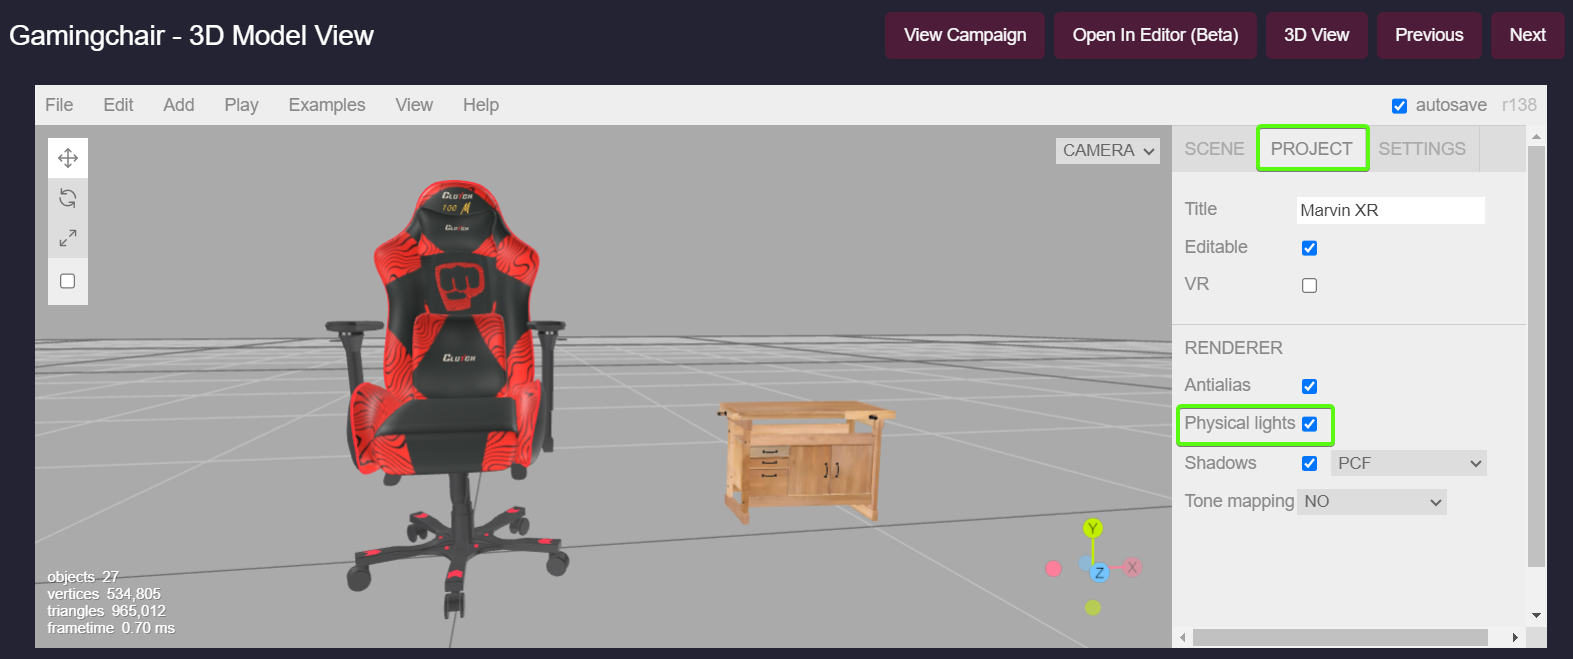
Go to the right panel of 3D Editor and click on Scene option (under Camera).
Scroll down to UUID menu and click to adjacent button NEW.
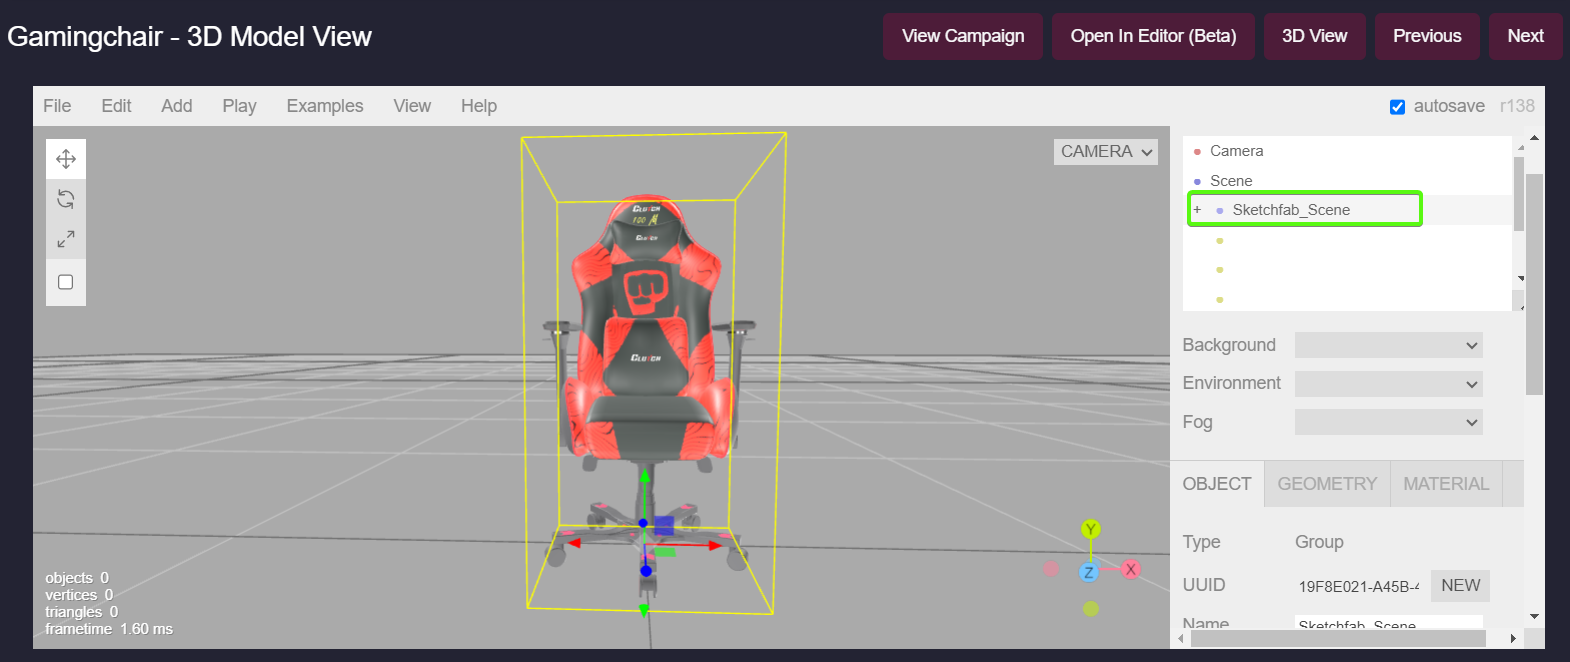
As soon as you click on the NEW button to create a new UUID, the model will become editable. You can see the object layers appearing under Scene.Click on the first top level layer and start editing.
You can move, rotate, increase/decrease model size, add objects, slide, separate layers and many more functions using the 3D editor.
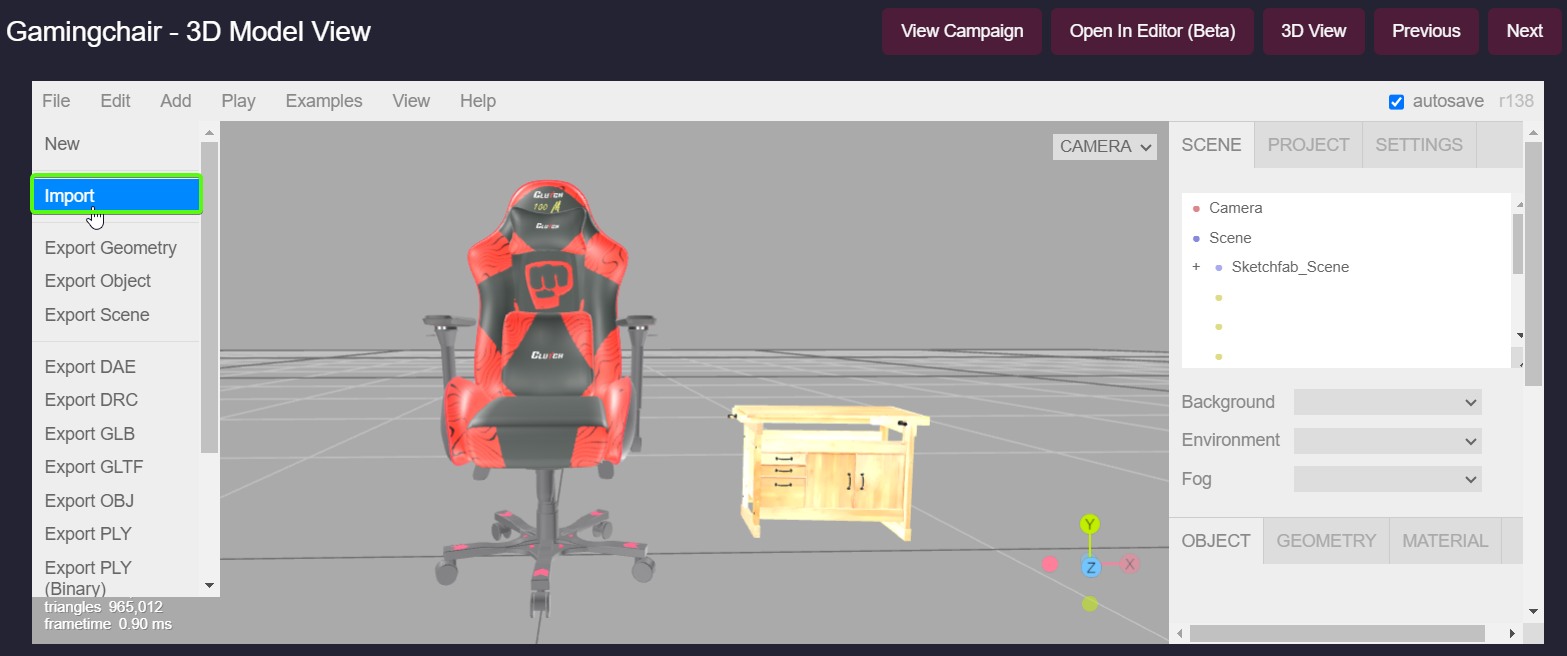
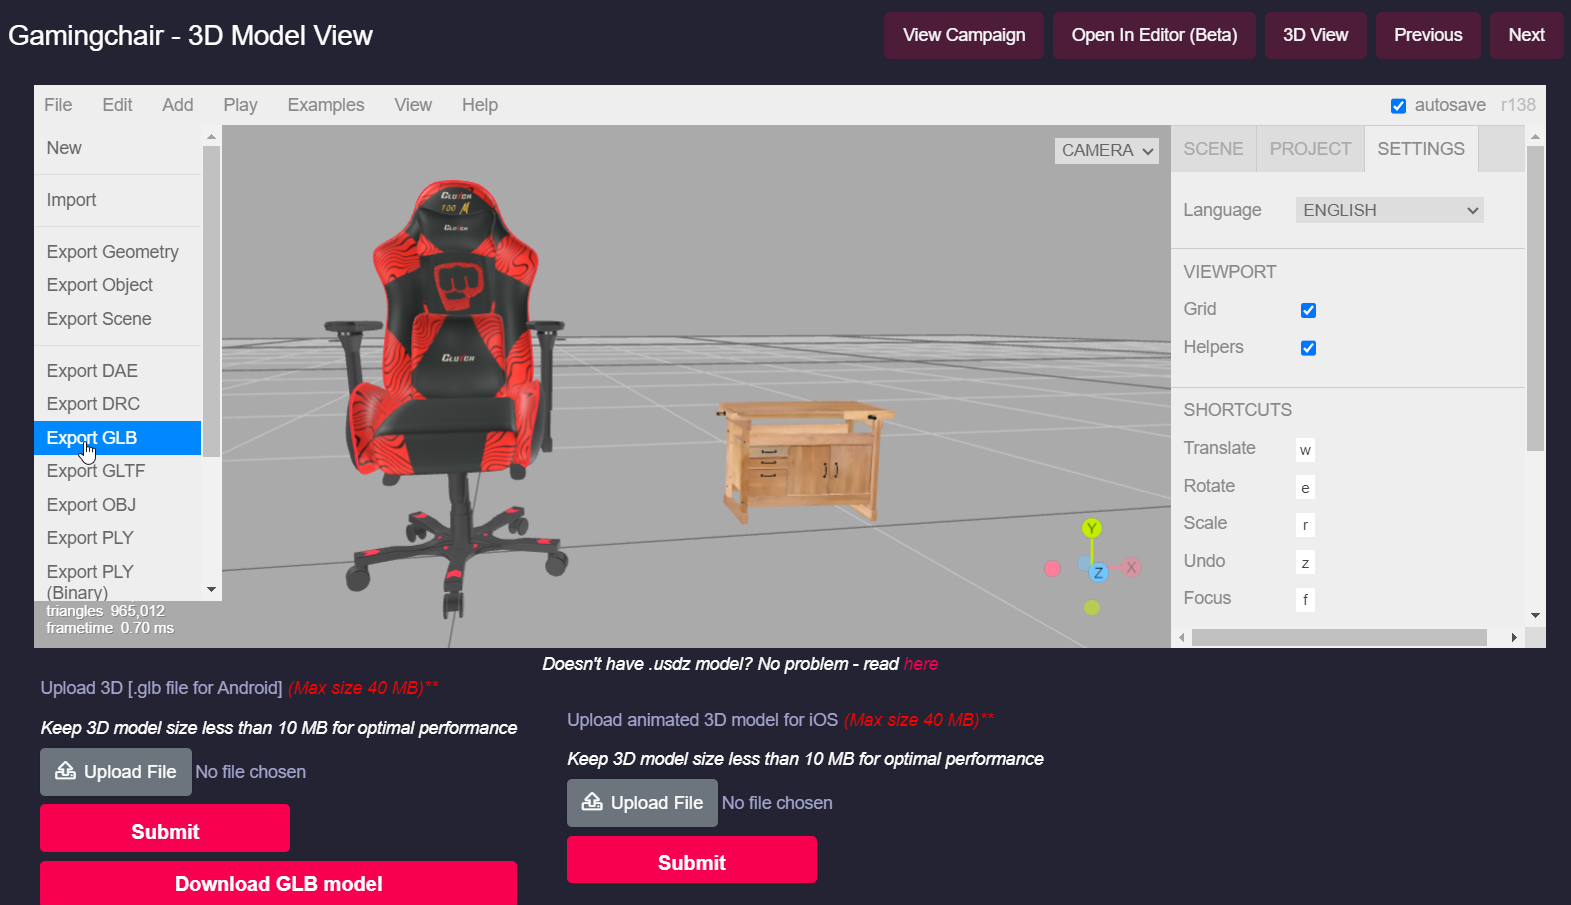
To add another 3D object to the scene, you can import a 3D file.
Once you are done playing around with the 3D Editor, you can finally export the scene as GLB and USDZ formats and upload to the AR campaign.
Known Issue
You are done 3D editing one AR campaign and move on to the next. Sometimes, due to browser caching issue, you can see the earlier 3D object getting loaded to the new 3D model editor. If you see this, please close the browser and open again (opening in incognito mode will help). If you are using Google Chrome, cleaing the browser cache with Shift + F5 will definitely help.
No Comments