How to create location AR campaign
Follow the below steps to build your first AR campaign within minutes. Go to the central dashboard (after you login, you land up here) and click on any of the buttons - Create AR Campaign or Add New Campaign.
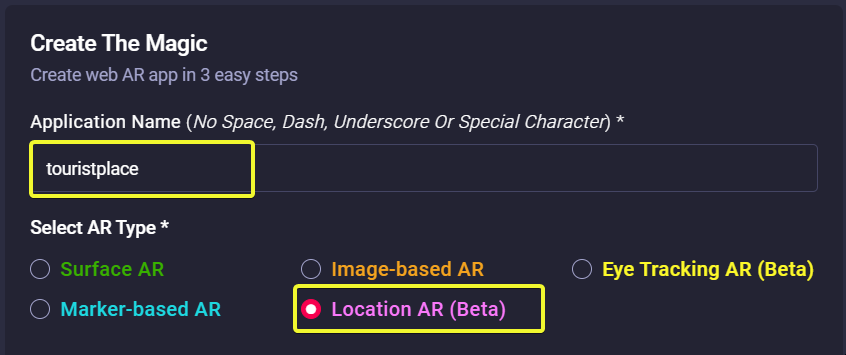
1. Provide a name for your campaign.
Please remember not to use any space, underscore or special characters within the campaign name (Read here the reasons).
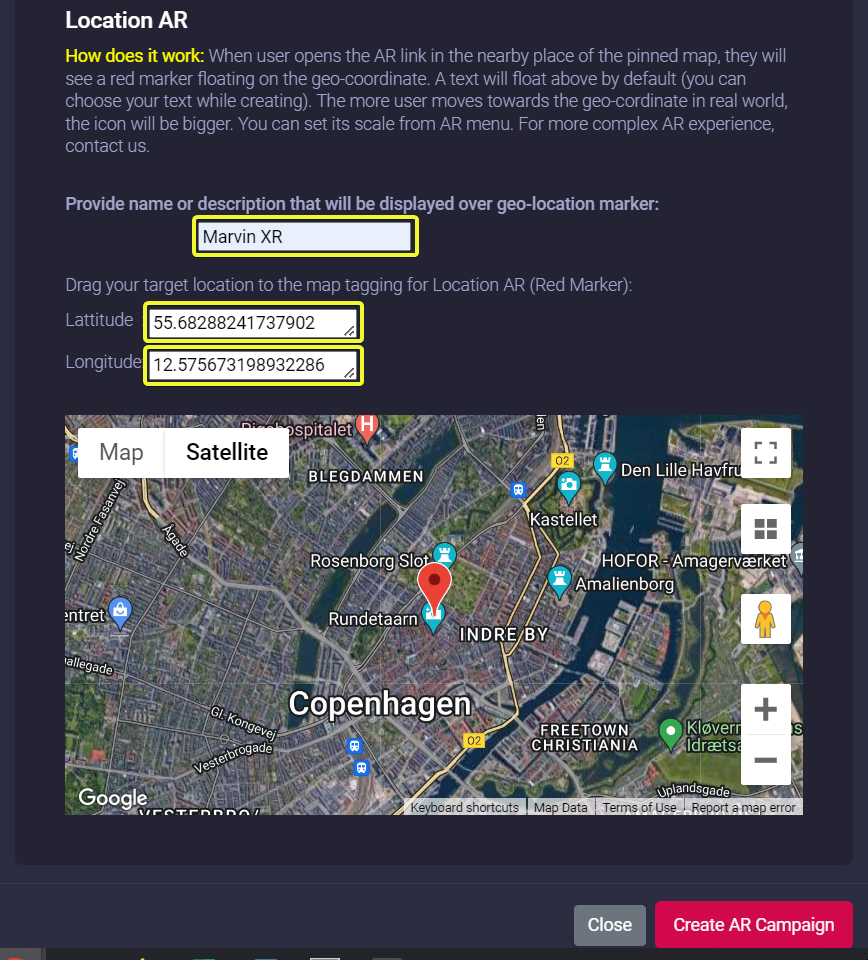
2. You need to create a marker which will be displayed over a certain geo-coordinate when users reach there. Marvin XR provides an option to make it more meaningful. Instead of just a red location dot, you can write a piece of text which will be visible to the users. This way, you can promote a certain brand, name, tagline, key phrase or many more.
|
Provide name or description in the next input field that will be displayed over geo-location |
3. Drag the google map to your desired location and place the Red Letter Pin on that specific coordinate. The lattitude and longitude will be automatically updated in the above text.
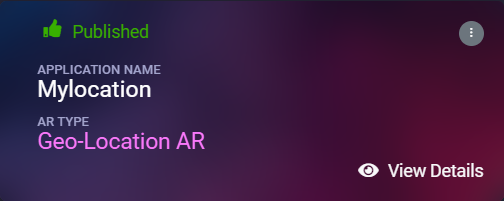
4. Click on the Create AR Campaign button to finish the setup.
Congratulations! Now you have created your first location-based AR campaign. Enjoy the experience.
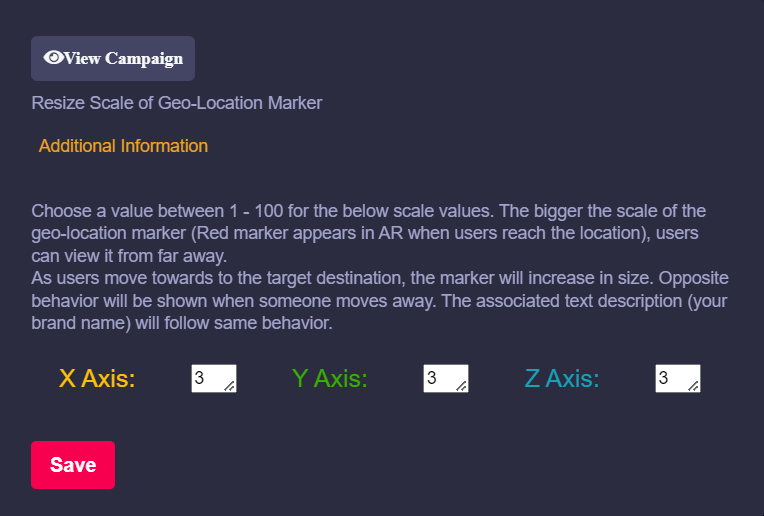
More config: The location AR text will be visible when you are almost close to 1000 meter from the pin pointed coordinate. The more you'll move towards the location, the bigger the marker-text will be. When you reach the target location, you can view the text in the correct sizing.
No Comments